Windows Server 2012 Failover Cluster SQL 2012 SSL configuration

A project recently had me working on Windows Server 2012 Failover Cluster SQL 2012 SSL configuration for an international company who had recently provisioned this new Windows cluster to replace an aging cluster already in place. There are a lot of blog posts out there that gave me bits and pieces of what I needed to configure SSL in SQL on a set of clustered servers, however, I wanted to wrap everything up for you guys on the steps I used to configure the servers.
To my surprise, the supported means to setup SSL certificate configuration for SQL still has one hacking the registry to properly configure the certificate to be seen in the clustered set of servers, which I will show below. Other than the registry hack, the most tedious part is simply provisioning a certificate. In this environment, we didn’t care whether or not it was a certificate from a trusted certificate authority, so instead decided to generate SSL certs manually with SelfSSL. The SelfSSL utility is part of the IIS 6.0 Resource kit and is a simple command line utility that enables one to create certificates from the command line without having to employ another utility or an entire PKI infrastructure simply to create a certificate.
Also as a reference note, there is another more recent and feature rich command line utility is makecert.exe which is contained in the Visual Studio products as well as SDKs for .Net framework. However, for this process I already had access to SelfSSL and didn’t have the makecert utility available so I simply used SelfSSL to create the cert. The certificate doesn’t have to be anything fancy, however, I created a 2048 bit cert with the FQDN of the cluster virtual server name which is necessary to make the SSL configuration work correctly.
SelfSSL
The command to create the required SSL cert for the SQL server instance is not difficult at all. The most important part of this step is that we generate the certificate CN to be the virtual cluster name of the SQL instance. The syntax I used is below:
selfssl.exe /N:CN=TESTSQLCLSTR.TESTAD.Local /K:2048 /V:3650 /T
The command above will create a certificate in the Personal Certificates store and the /T switch also copies it to the Trusted Root Certification Authorities Certfiicates store on the Node of the cluster you are logged into. After generating the certificate on one node, you need to export the certificate to the other node. You can do this via the Certificates MMC snapin.
- Export the certificate along with the Private key as well as the extended properties of the certificate
- Create a password for the certificate
- Copy the .PFX certificate to the other node to the desktop, etc.
- Import the certificate into the Personal Certificate store of the local computer on the other node.
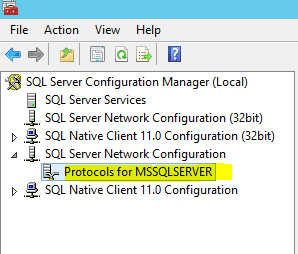
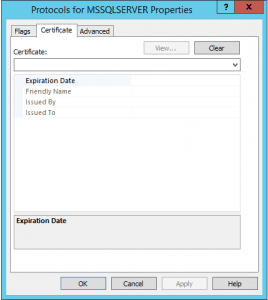
Once you have the certificate in place, on a cluster, there is a weird little step you have to do to get the certificate to work correctly. Normally in SQL Configuration manager you would go to the properties of SQL Server Network Configuration >> Protocols for MSSQLSERVER. However, as you see below, even after I uploaded the cert, I didn’t have a certificate in the dropdown menu of the Protocols properties which normally you would if it can read the certificate. The problem is that the CN or common name on the certificate doesn’t match the hostname of the box since we need our cluster virtual name instead of the hostname.
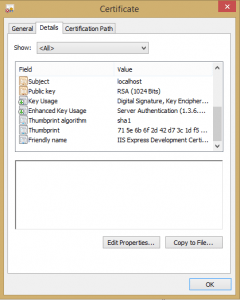
You have to get the Thumbprint from the certificate itself, take the spaces out of it and then enter this value into the Certificate string value found at the following registry location:
HKLMSoftwareMicrosoftMicrosoft SQL ServerMSSQL11.MSSQLSERVERMSSQLServerSuperSocketNetLib
In the details of the certificate, you will see the Thumbprint value. This is the value that goes in the registry key without spaces.
A quick and easy way I found to take these out besides using notepad is to visit the site: https://www.miniwebtool.com/remove-spaces/ This site provides a quick and easy web form to paste your text in and remove the spaces.
After you have the certificate in place on both nodes and the registry value in place as well, you should be able to force SQL SSL authentication and the service should start correctly. Also, test failing the nodes back and forth a few times to make sure everything fails over correctly.


